Photo Tagging Made Easy in Tokie – Label Images, Organize Faster, Deliver On Time

Photo Tagging Made Simple: How Photographers Label Images in Tokie
Keeping thousands of shots organized is a battle every photographer knows too well. Photo tagging and photo labelling sound straightforward—until your archive spans weddings, studio sessions, and personal projects across multiple drives. Tokie turns every folder into a mini-database, so you can label images exactly the way you think about them and find any file in seconds. Below are real-world use cases showing how Tokie helps photographers manage pictures without losing creative flow.
Why Traditional “Picture of Label” Workflows Break Down
- Finder or File Explorer keeps metadata hidden in side panels, forcing constant clicks.
- Keywording in Lightroom works—but only inside Lightroom. Moving the files means re-cataloguing.
- Generic file tagging windows solutions don’t handle RAW sidecars or video clips shot on the same day.
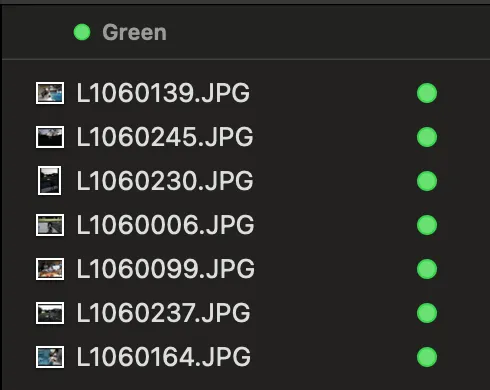
Tokie puts the tags right inside the folder view next to the file names. No extra app, no new import step—just add columns and start typing and labelling.
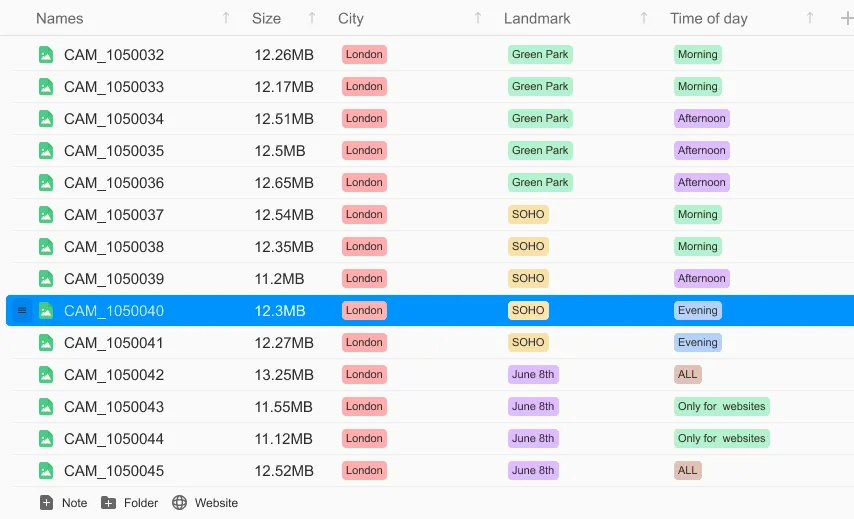
Use Case 1: Tag This Photo With Client & Project
Scenario: You deliver brand campaigns for three agencies at once.
- Create a “2025 Campaigns” parent folder.
- Add custom fields:
Client,Shoot Date,Usage Rights. - Add labels to each file.
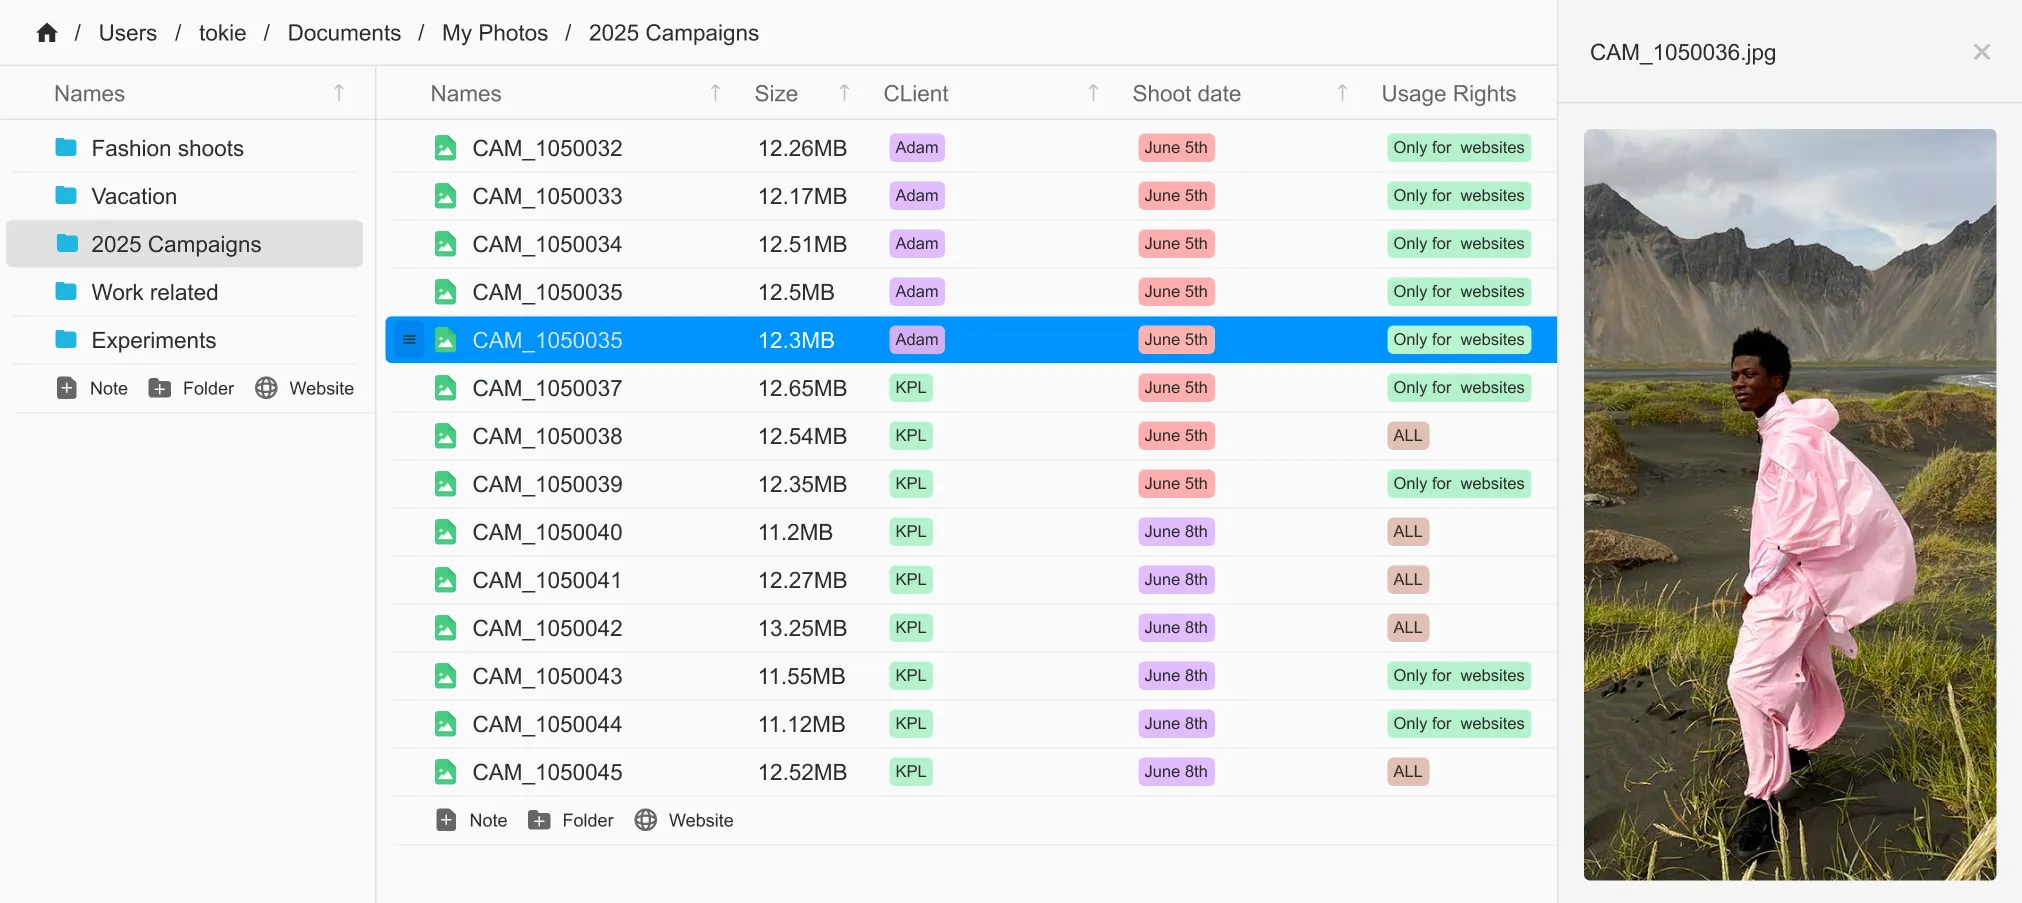
Now a quick sort on the Client column groups every labelled picture for approval, even if RAW and retouched JPEGs sit side by side.
Use Case 2: Location-Based Photo Labelling for Travel Shoots
Scenario: A week-long road trip produces 4 memory cards per day.
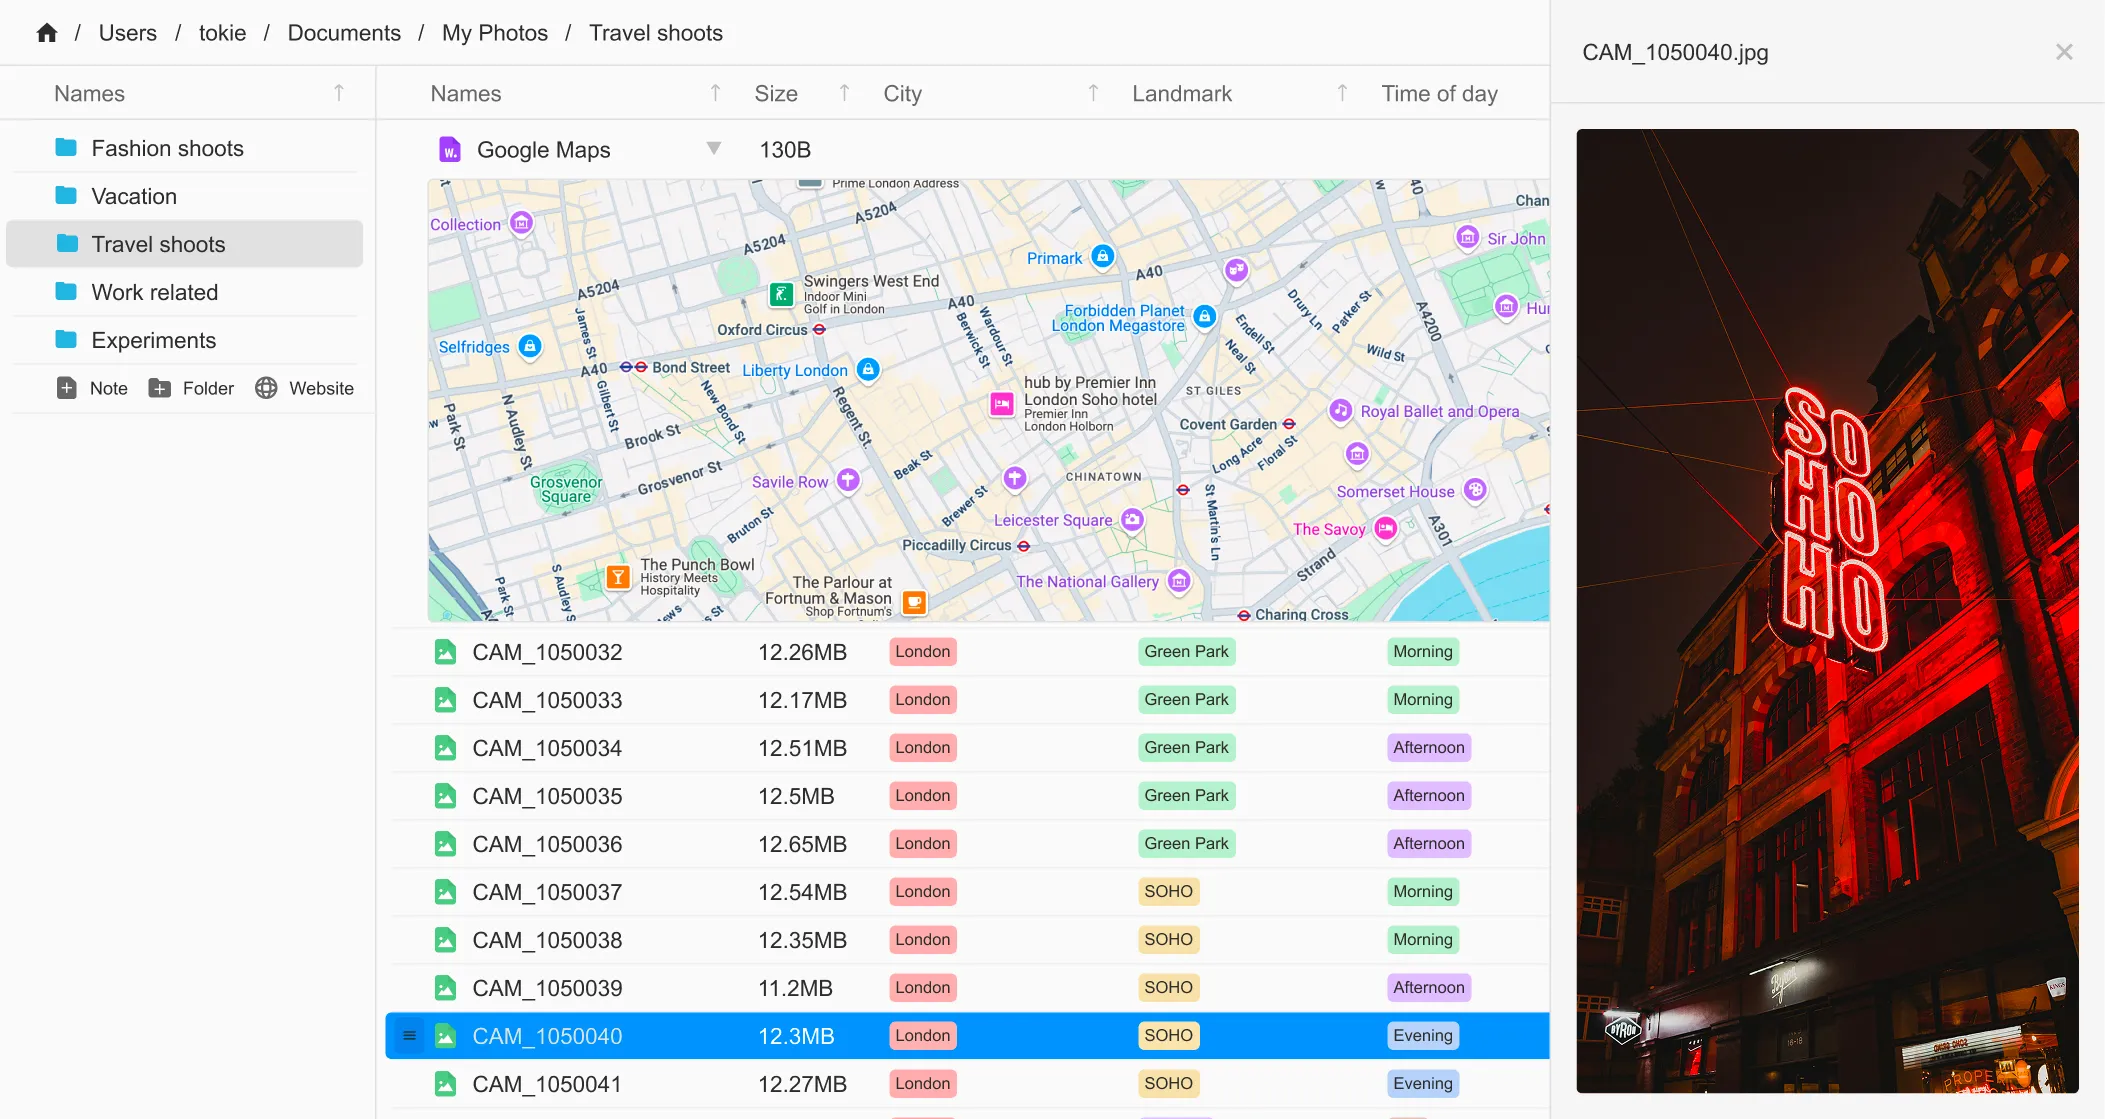
- Create tags like
City,Landmark,Time of Day. - Drop GPS coordinates into Tokie’s notes field or paste a Google Maps link—Tokie renders it inline.
- Sort it with any column and find what you need instantly.
Use Case 3: Editing Workflow—From “To Cull” to “Final Deliverable”
- Add a
Statusdropdown:To Cull,Selects,Retouched,Delivered. - Use sort to group them in order, and click on the image to preview.
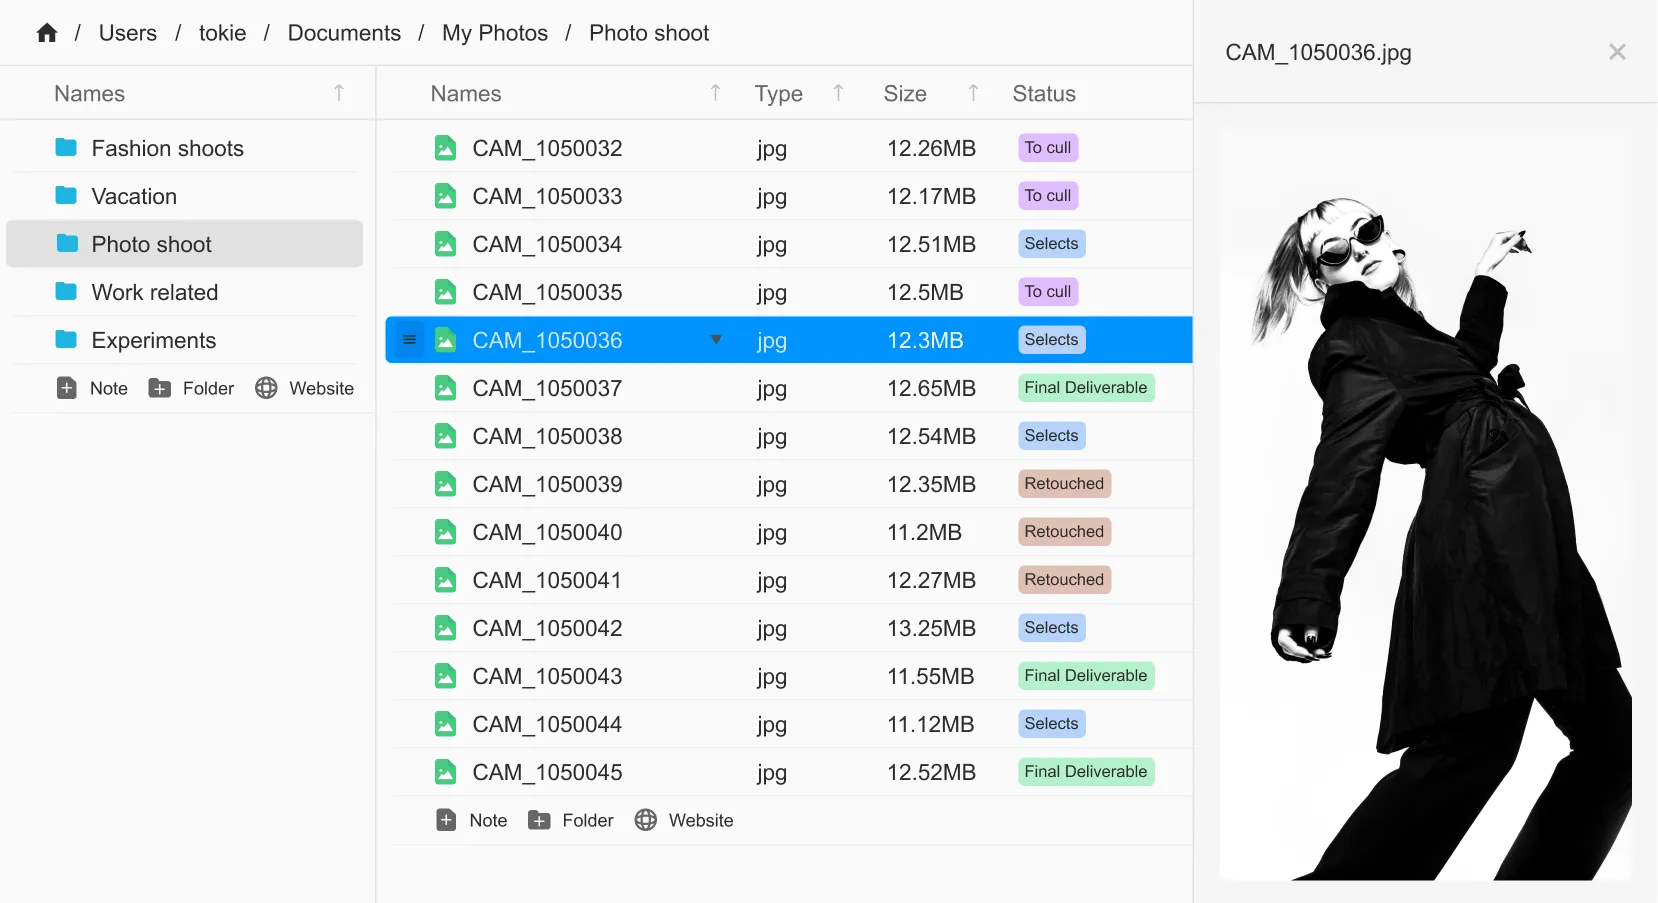
Because each label pictures step happens inside the folder, you keep the RAW hierarchy intact for backup utilities.
Use Case 4: Cross-Device File Tagging
Many studios split work within the team.
Tokie’s database lives in a hidden file inside the folder, so labeling picture data travels with the files. Open the same drive on another device—Tokie reads the tags instantly. No more “missing catalog” errors after copying drives.
Pro Tips for Faster Photo Tagging in Tokie
| Tip | Benefit |
|---|---|
| Create templates for recurring shoots (e.g., Weddings) | Reuse field sets and dropdown values |
| Use autocomplete when you label images | Consistent spelling prevents broken searches |
| Side peek panel previews PNG, JPEG, and even video snippets | Decide on keeps/rejects without launching heavy apps |
Getting Started
- Download Tokie for macOS.
- Open an existing shoot folder; Tokie auto-indexes files.
- Click “Add Field” and start tagging—no database setup required.
With Tokie, photo tagging is no longer a chore. It’s the backbone of a sortable, shareable archive that grows with your career.
Ready to Try?
Grab the free version of Tokie and tag this photo, that photo—every photo—exactly the way you want. Your future self will thank you when deadlines hit.
Ready to try Tokie?
Transform your file management experience with Tokie's powerful features.